 Pin it
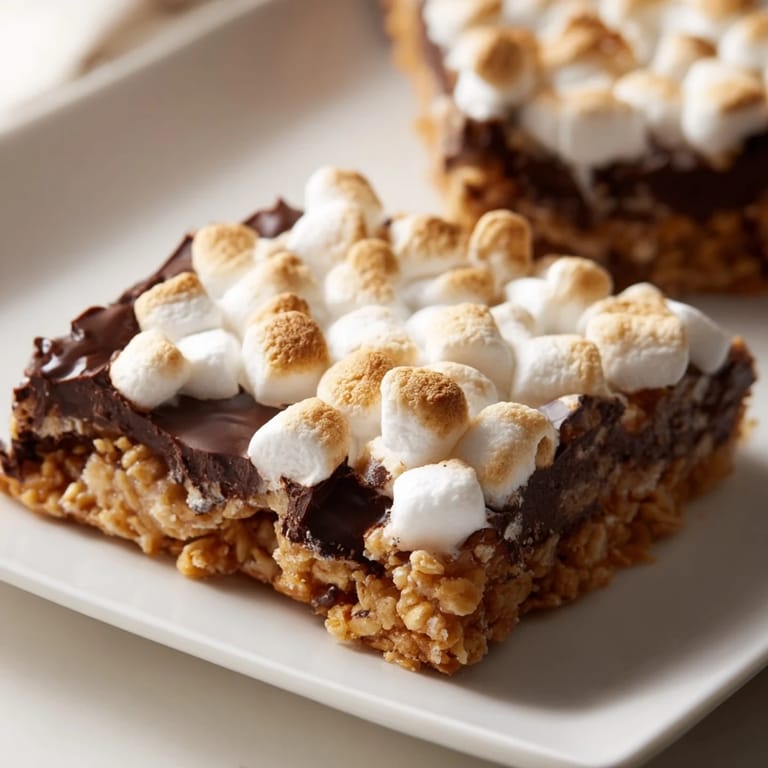
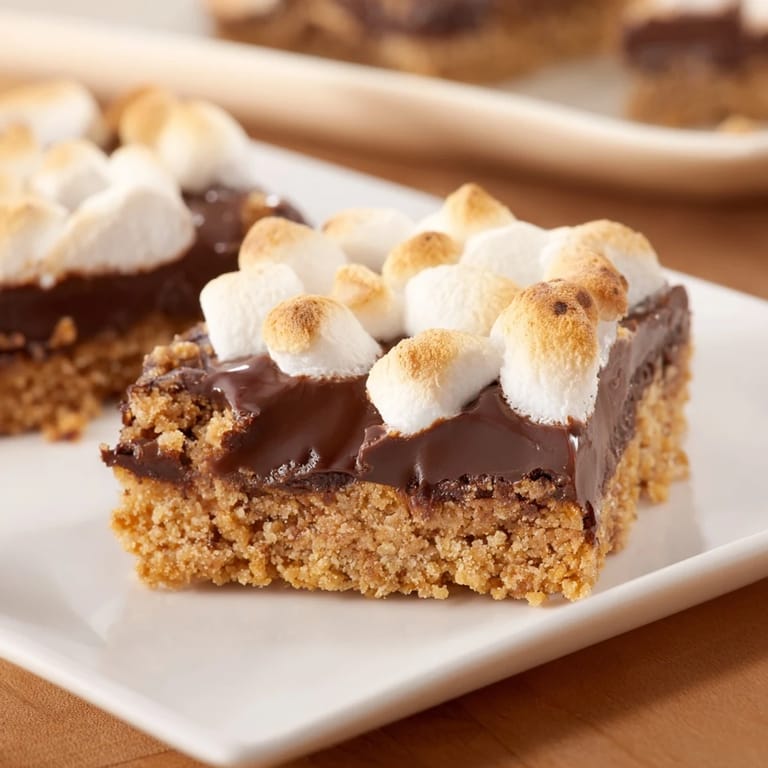
 There's something about s'mores that stops time. Years ago, I was at a friend's cabin during a late summer evening when someone suggested making s'mores indoors because the mosquitoes were relentless. I laughed at first, but then we figured out we could bake the whole thing. These bars captured that moment perfectly—all the char and sweetness and chocolate mess without having to sit by a campfire swatting bugs.
I made these for my nephew's birthday party, and watching six-year-olds bite into one and go completely silent was worth every minute. Then they all asked for seconds, and I realized I should have doubled the batch.
Ingredients
- Graham cracker crumbs: Use 1 1/2 cups (180 g)—finely crushed so the crust holds together like a dream instead of becoming gritty.
- Unsalted butter, melted: 1/2 cup (115 g) binds everything and keeps the crust tender rather than tough.
- Granulated sugar: 1/4 cup (50 g) adds sweetness and helps the crust crisp up slightly at the edges.
- Semi-sweet chocolate chips: 1 1/2 cups (260 g) is the heart of these bars—that reliable, not-too-intense chocolate flavor everyone expects.
- Mini marshmallows: 3 cups (150 g) are essential because they toast faster and distribute more evenly than large ones.
Tired of Takeout? 🥡
Get 10 meals you can make faster than delivery arrives. Seriously.
One email. No spam. Unsubscribe anytime.
Instructions
- Heat your oven and prep:
- Set the oven to 350°F (175°C) and line an 8x8-inch pan with parchment paper, leaving some overhang so you can lift the whole thing out later without wrestling with it.
- Mix the crust:
- Combine graham cracker crumbs, melted butter, and sugar in a bowl until it looks like wet sand. It should hold together when you squeeze it, but not feel greasy.
- Press and bake the base:
- Press the mixture firmly and evenly into the pan—use the bottom of a measuring cup for even pressure. Bake for 8 minutes until it smells toasted and slightly golden.
- Layer the chocolate:
- Sprinkle chocolate chips over the warm crust while it's still hot so they soften faster. Pop it back in the oven for 2 minutes, then spread them out with a spatula into one silky layer.
- Add and toast marshmallows:
- Scatter mini marshmallows across the chocolate, pressing gently so they don't roll off. Bake for 10-12 minutes until they puff up and develop golden-brown peaks on top.
- Cool and cut:
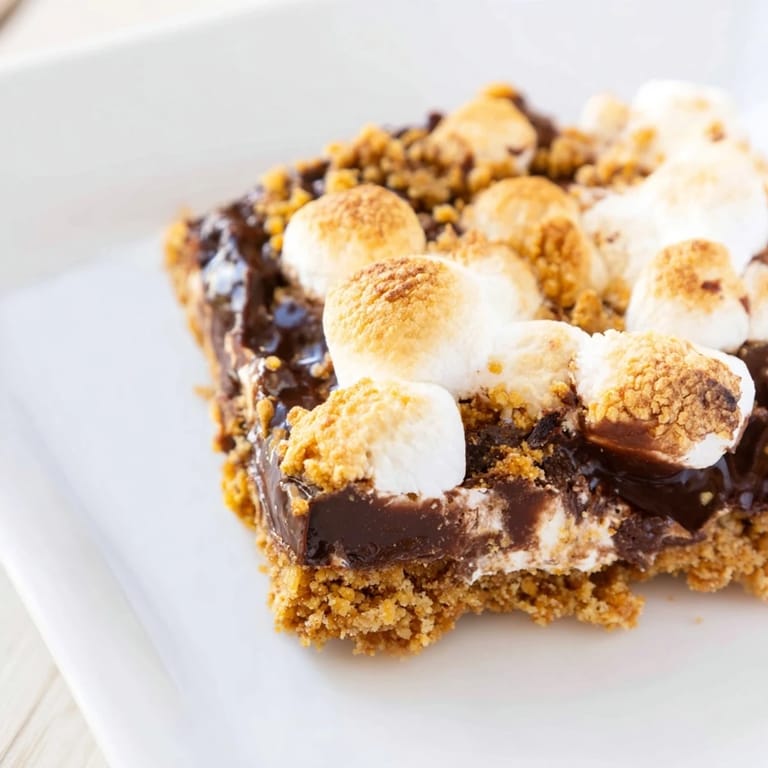
- Let the bars cool completely in the pan, then refrigerate for 1 hour so the chocolate sets and cutting becomes clean instead of messy. Lift out using parchment paper and slice into 16 pieces.
 Pin it
 These bars became the thing I brought to every potluck for a year. People would ask me to make them again before I even finished serving the last batch, and honestly, that's when I knew I'd nailed something.
Why This Beats Campfire S'mores
There's no ash, no singed marshmallows, and you can actually control the heat. The chocolate doesn't separate, the graham cracker base stays crispy, and the marshmallow tops caramelize into this exact shade of golden that feels intentional instead of accidental. Plus, you get to eat them the next day when they've set into this perfect texture where the layers don't slide around.
Flavor Variations Worth Trying
I've tested a few swaps that genuinely work. A pinch of sea salt in the crust changes everything—it makes the sweetness sharper and more interesting. Milk chocolate instead of semi-sweet leans into pure indulgence if that's your mood. Digestive biscuits replace graham crackers seamlessly and add an almost buttery depth that's kind of dangerous because you'll eat more than you intended.
Storage and Serving Secrets
These keep for days in an airtight container, though they never last that long in my house. Serve them at room temperature for that gooey, luxurious bite, or slightly warm if you want to feel like you're really indulging. Cold bars are fine too, just different—more like eating structured chocolate instead of a textured experience.
- Keep them covered or they'll absorb every smell in the fridge and taste faintly like last night's leftovers.
- If you're making these ahead for an event, assemble them a day early but wait to cut until a few hours before serving so the layers stay distinct.
- A thin spatula makes cutting cleaner than a regular knife, especially if you dip it in warm water between cuts.
 Pin it
 These bars are proof that some of the best moments don't need a campfire, just butter, chocolate, and the willingness to bake something unapologetic. Make them, share them, and watch people's faces light up like they just tasted summer.
Recipe Questions & Answers
- → How do I get a firm crust in these bars?
Press the graham cracker, butter, and sugar mixture firmly and bake it before adding the chocolate layer to ensure a sturdy base.
- → Can I substitute the marshmallows with another sweet topping?
Mini marshmallows provide the classic toasted topping, but you can experiment with marshmallow fluff or melted white chocolate for variation.
- → What is the best way to melt the chocolate layer evenly?
Sprinkle chocolate chips over the warm crust and return to the oven briefly, then spread gently with a spatula for an even layer.
- → How can I make slicing these bars easier?
Allow bars to cool completely, then chill in the refrigerator for about an hour before slicing to ensure clean cuts.
- → Are there flavor variations to enhance these bars?
Adding a pinch of sea salt to the crust or using milk chocolate instead of semi-sweet can add a richer and sweeter touch.